Starting with version 69, Chrome OS users can use Linux applications. This is a game changer for Chrome OS, as it opens a massive catalog of available software. Here’s how to get started.
Before we get into the details, it’s worth mentioning that Chrome OS version 69 isn’t yet available on the stable channel—it started hitting the beta channel of many Chromebooks the week of August 13, 2018, but is also available on the developer channel. Similarly, Linux apps aren’t yet available for every Chromebook that’s running version 69, either. There isn’t a definitive list available, so your mileage may vary.
To get started, you first need to move over to (at least) the beta channel. We have instructions on how to change channels on your Chromebook if you need them.
Note: You can move to channels with newer versions of Chrome OS (i.e. Stable to Beta) without powerwashing your Chromebook. However, if you want to move back to a more stable channel (i.e. Beta to Stable), you will need powerwash your system.
Once you’ve decided to make the leap to the beta (or even developer) channel, you’re ready to rock and roll with Linux apps.
How to Enable Linux Apps on Chrome OS
To get started, jump into your device’s Settings menu by clicking the system tray and then the “Settings” button. (Note: I’m on the Chrome OS developer channel with the “New System Menu” flag enabled, so the following screenshot may look different than what you have.)

In the Settings menu, scroll down to the bottom. There should be an entry titled “Linux (Beta).” If it’s there, you’re in luck—your device supports Linux apps. Click the “Turn On” button to get everything rolling.

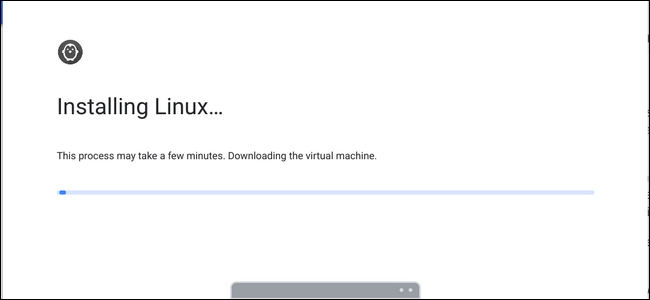
A new window will open that lets you set up Linux. Click the “Install” button to get started installing the Terminal.

It will take a few minutes for the process to complete, so just hang out for a few while it does its thing. When it’s finished, the Terminal will start automatically.

How to Use the Terminal to Install Apps
If you’ve never used Linux before, the thought of having to use the Terminal to install applications can be a bit daunting. But don’t fret—it’s quite simple and uses a very common system called APT.
To get started, let’s update the apt package list to make sure all the newest stuff is available. Type the following command in the Terminal and then hit Enter:
sudo apt-get update

When that’s finished, you’re ready to install your first app.
Since photo editors are one of Chrome OS’ biggest weaknesses, let’s start with GIMP—an open source Photoshop-like editor. Type the following command and then hit Enter:
sudo apt-get install gimp
It will look for a package called GIMP and then tell you how big it is before the installation. You’ll need to press “Y” to confirm you want to install it. From there, just let it do what it does—it may take a while, so grab a coffee.

After the installation, you can go ahead and type “gimp” at the terminal to start the app, but an icon for it should also show up in your app drawer just like anything else you install!

This is pretty much the way you’ll install all your Linux apps, but there’s also another command you should be familiar with:
sudo apt-get upgrade
This command pulls updates for all of your currently installed apps. It’s good to pair this with the update command you used earlier, which you can do pretty easily:
sudo apt-get update && sudo apt-get upgrade

It’s a good idea to run those commands pretty regularly. There’s also another option for installing software: the Gnome Software Center.
How to Install and Use the Gnome Software Center on Chrome OS
Installing the Gnome Software Center is no different than installing any other app with apt. Type the following command and then hit Enter:
sudo apt-get install gnome-software gnome-packagekit
Again, hit “Y” when prompted to install the software. It will download all the necessary files to install the Software Center, which will then show up as “Software” in the app drawer.

Linux apps are still very much in beta right now, so I couldn’t get the Software Center to load on my system fully. Instead, I got this:

Still, I was able to search for applications and install from there, which is better than nothing. The experience may be different for you, of course.

But the point remains: the Software Center is, for all intents and purposes, a GUI front-end for apt, which makes it even easier to install software.
Installing Other Types of Applications
Apt and the Software Center aren’t the only ways to install Linux apps on Chrome OS—there are also standalone .deb installers.
In theory, you should be able to easily install a .deb file—which can be likened to a Windows .msi installer—by simply double-clicking the file. This feature hasn’t yet made its way to all Chrome OS devices (even on version 69), so again, your mileage may vary. It isn’t available on my Pixelbook on the Developer Channel running Chrome 69 yet, for example.
(Source: How to Geek)